DIY: Paint Your Own Seaside Pebbles using Qrain Direct-ink Acrylic Markers 24 Colors – Nahuku
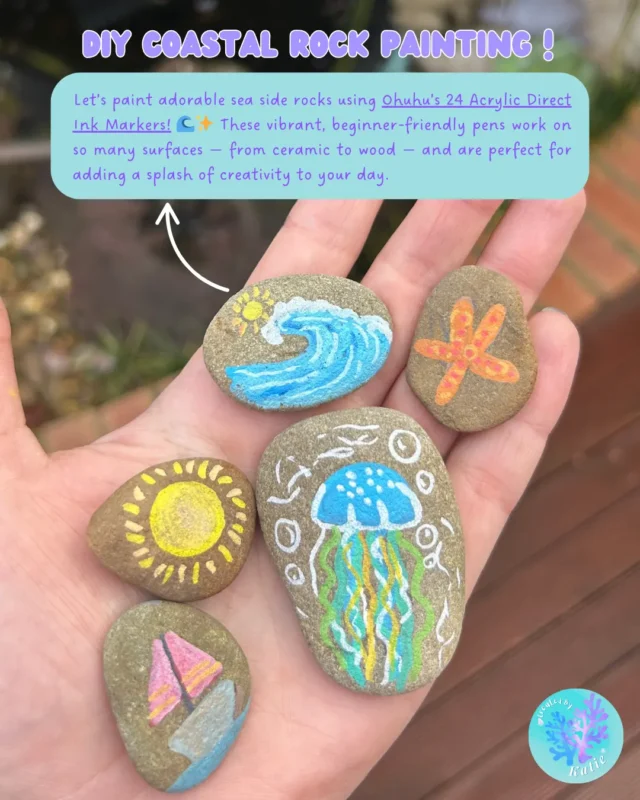
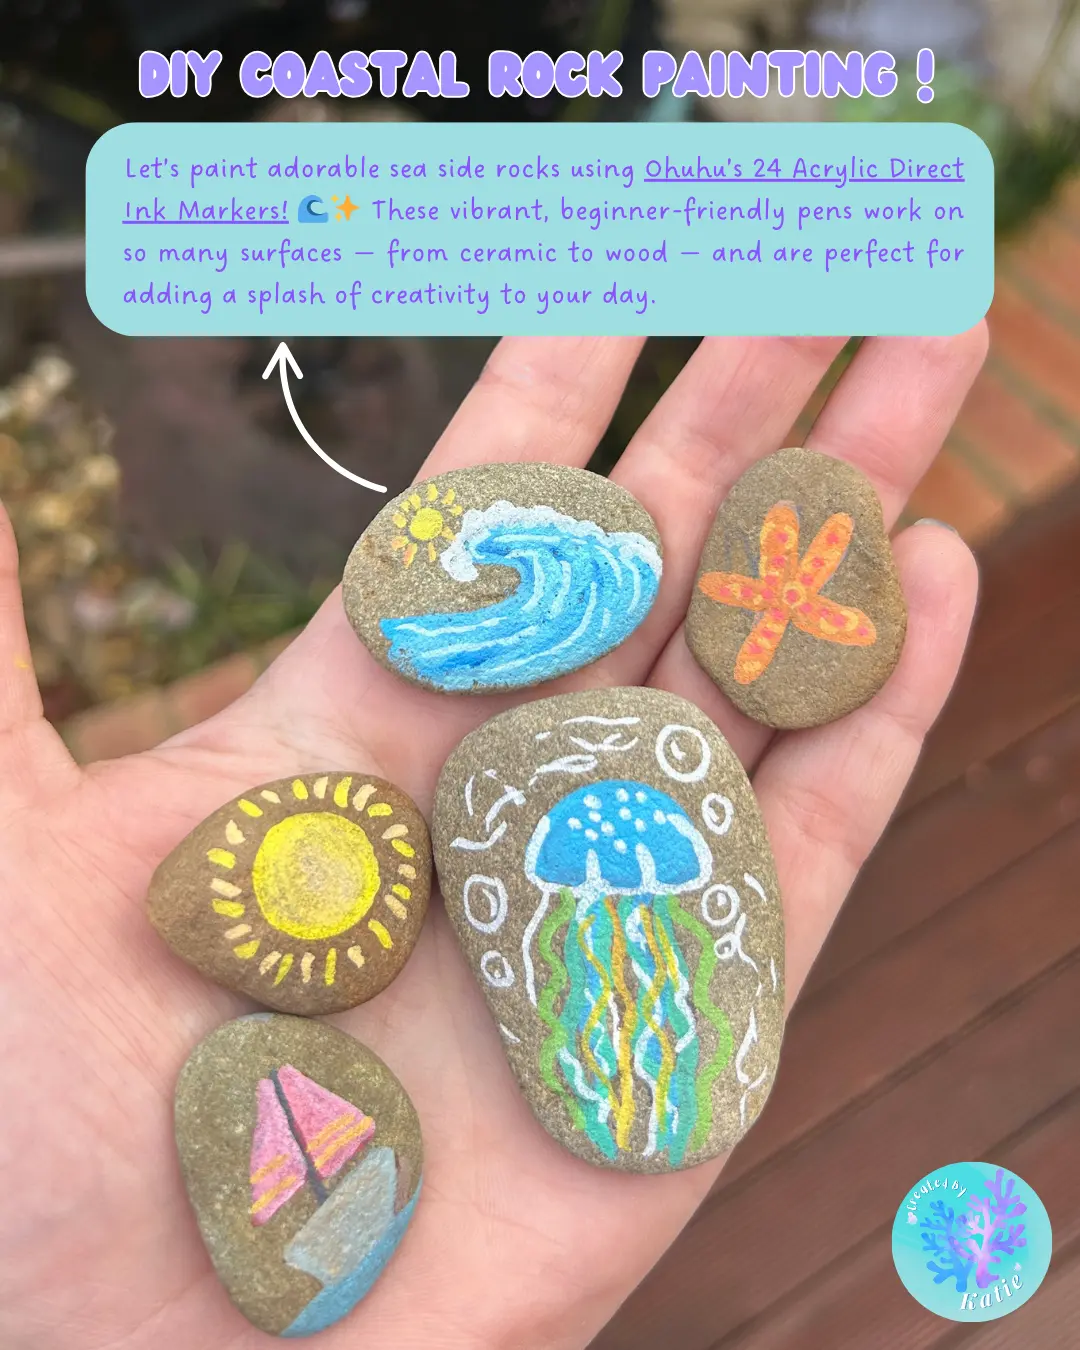
Today, I’m sharing a super fun and easy Pebble DIY project where you’ll learn how to paint on pebbles perfect for beginners or anyone who loves the ocean like me!
Using the vibrant Ohuhu Acrylic Direct-Ink Markers, Whether you want to keep them for yourself or gift them to a friend, these pebbles are a perfect summer DIY.
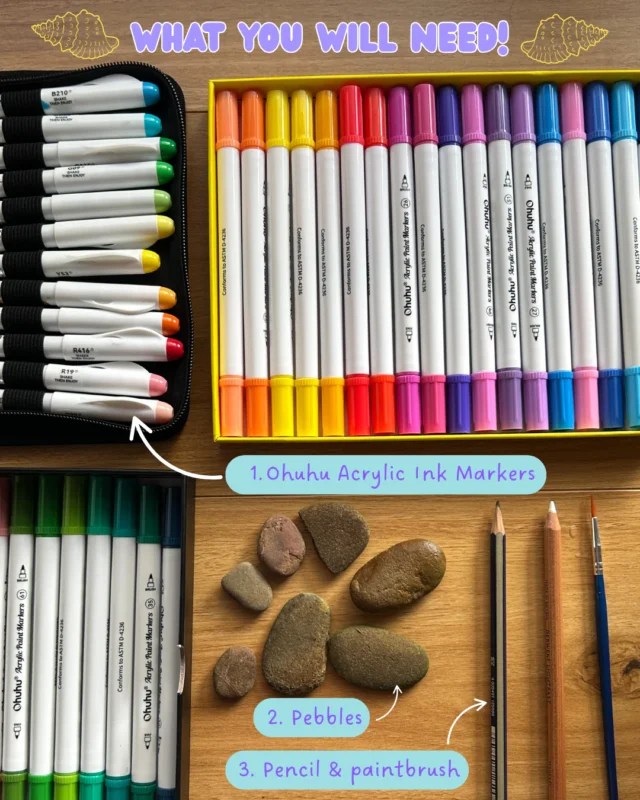
What You’ll Need:
Pebbles
· Ohuhu Acrylic Direct-Ink Markers (these markers are amazing because the ink flows smoothly and dries quickly)
· Pencil (for sketching your design first)
· Clear varnish or sealant spray (to protect your design)
· Keyring hardware (if your wood pieces don’t already have keyrings attached)
· Paper towel or cloth (to clean mistakes)
Step-by-Step Instructions:
Step 1: Prep Your Pebbles
Give your pebbles a quick wipe to remove any dust or dirt.
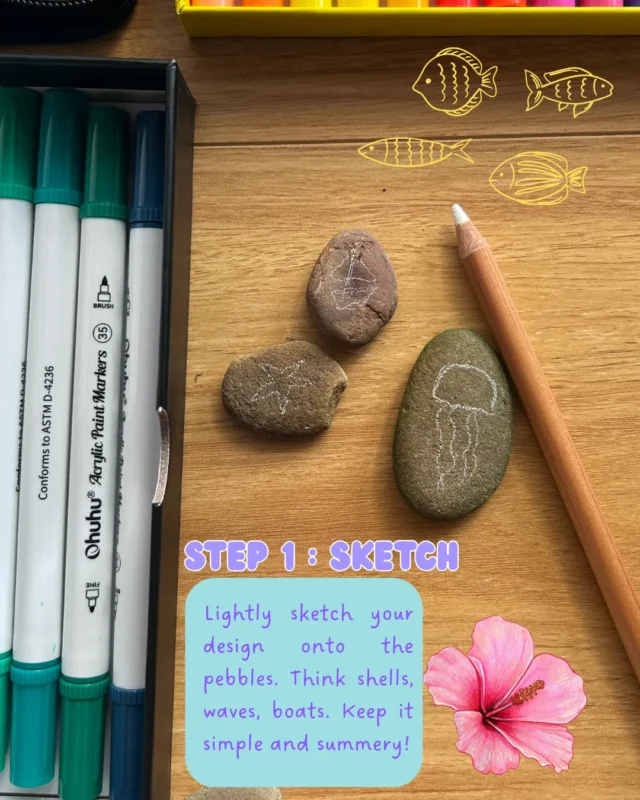
Step 2: Sketch Your Design
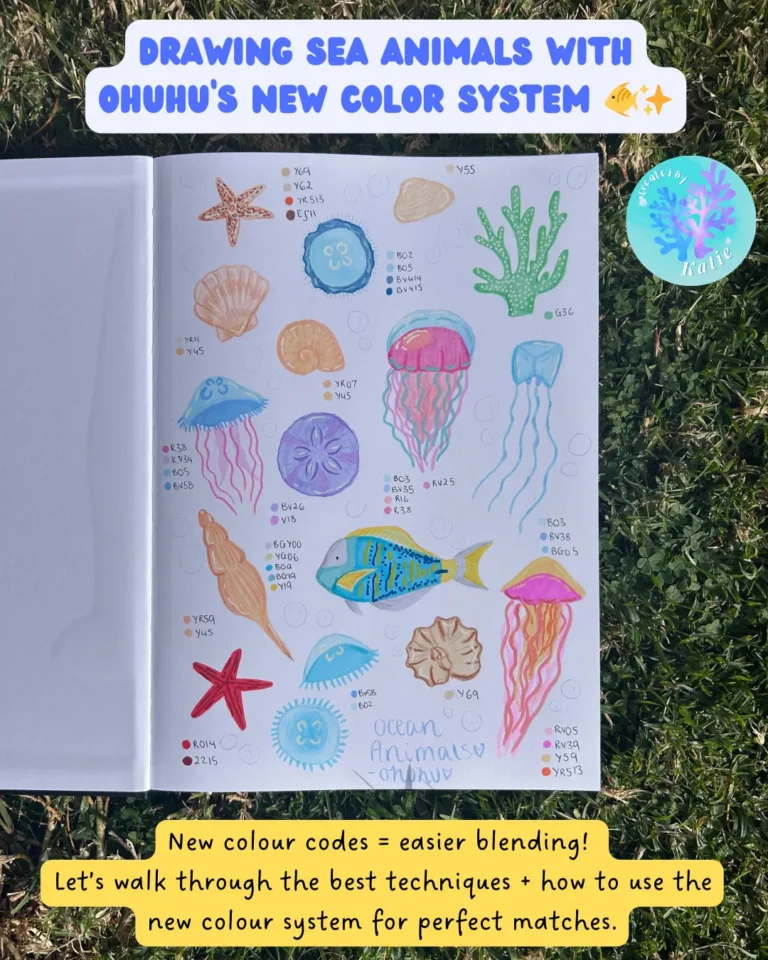
Use a pencil to lightly sketch your design on the surface. Sometimes using a white pencil helps the sketch come through a bit better. I like to go with simple ocean-inspired themes — waves, palm trees, sunsets, or even abstract beach patterns.
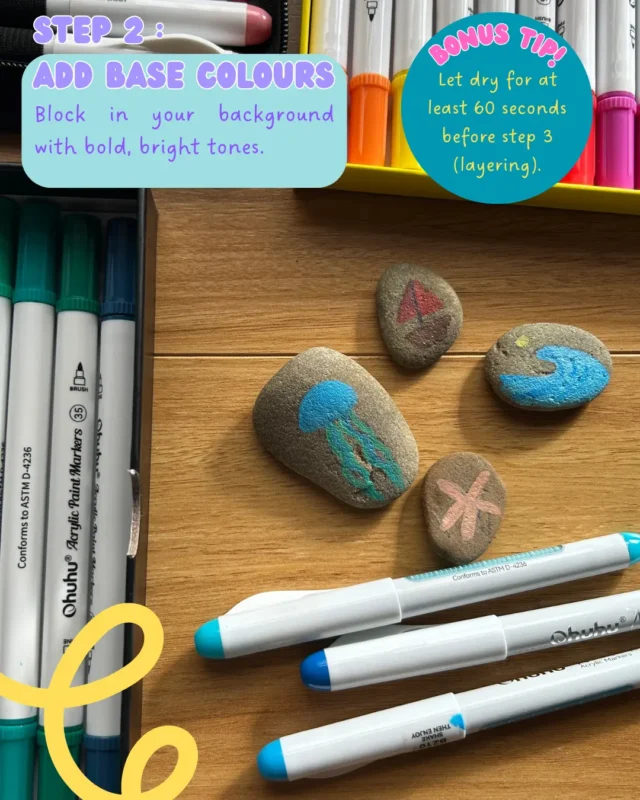
Step 3: Start Painting with Ohuhu Acrylic Markers
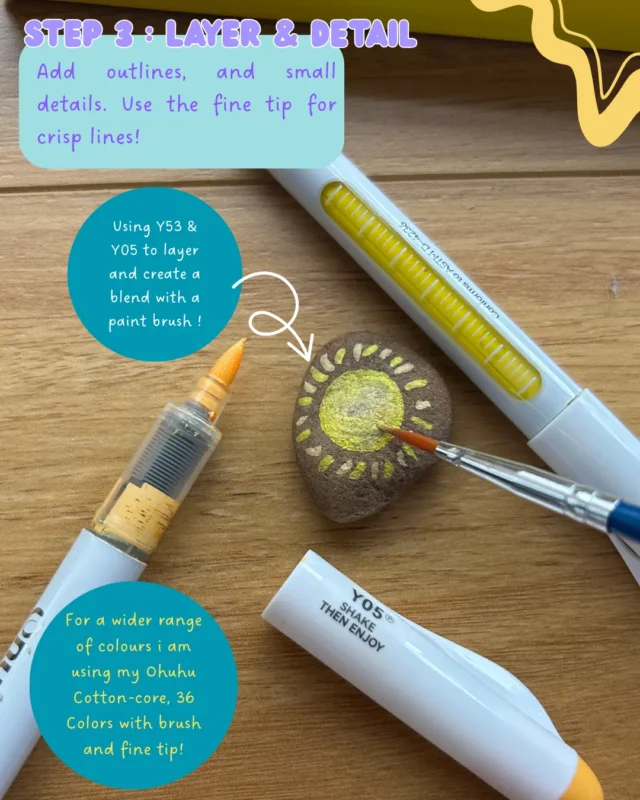
Now the fun part! Using your Ohuhu markers, start coloring inside your sketch. These markers are great for layering colors and blending — you can even add highlights or shading by varying your pressure and layering.
If you make a mistake, don’t worry! Quickly wipe it off with a damp paper towel while the paint is still wet.